> ## Documentation Index
> Fetch the complete documentation index at: https://docs.dqlabs.ai/llms.txt
> Use this file to discover all available pages before exploring further.
# Sign in & Invite your team
> How to sign in to PRIZM, and how admins can invite and manage team members.
## Sign in to PRIZM
Open your web browser and navigate to the URL your team uses for PRIZM. This is typically provided by your administrator. The login screen displays the PRIZM logo, a welcome message, and fields for your credentials.
Type your registered email address into the **Email** field, then click **Send Verification Code**. Enter the code when it arrives.
If SSO is enabled for your organization, PRIZM detects this automatically and authenticates you through your identity provider — no verification code is needed.
PRIZM remembers the page you were trying to access before login. After a successful sign-in, you are automatically redirected to that page instead of the default dashboard.
## After signing in
Once inside PRIZM, the header gives you access to the full platform: **Assets**, **Metrics**, **Alerts**, **Issues**, and a **More** menu for additional sections.
Use the light/dark mode toggle in the top-right corner of the header to switch between light and dark themes. Click the moon icon next to the profile button to activate it.
***
## Invite your team
**Admin or Owner role required.** Only users with the Admin or Owner role can access the Access module and invite new members. If you need to add someone and don't have this role, contact your organization's administrator.
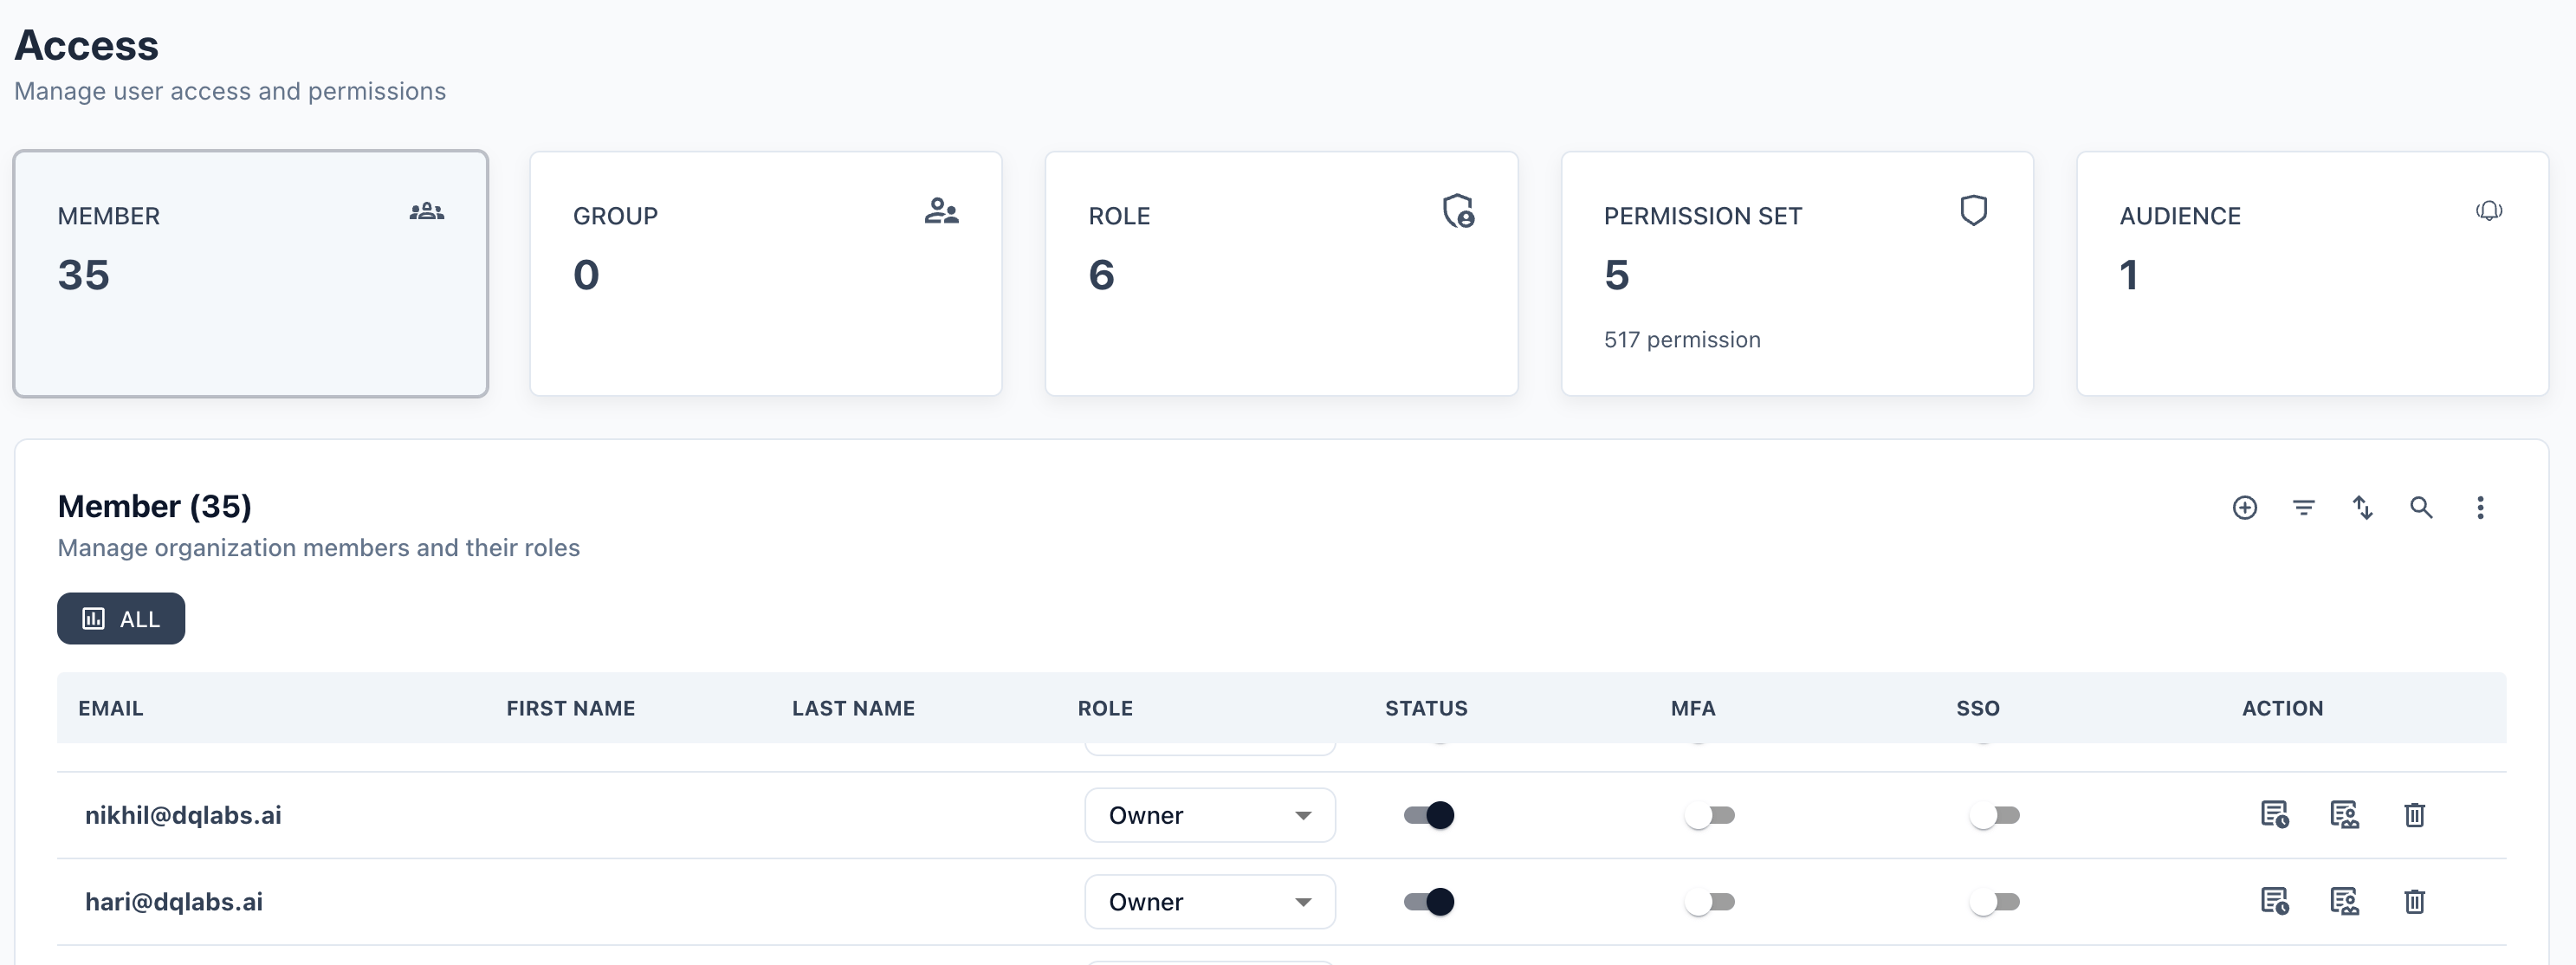
Click on **Access** in the top navigation bar. You will land on the Access page showing current Members, Groups, and Audience counts.
In the **Email** field, type the invitee's work email address.
```text theme={null}
Example: john.doe@company.com
```
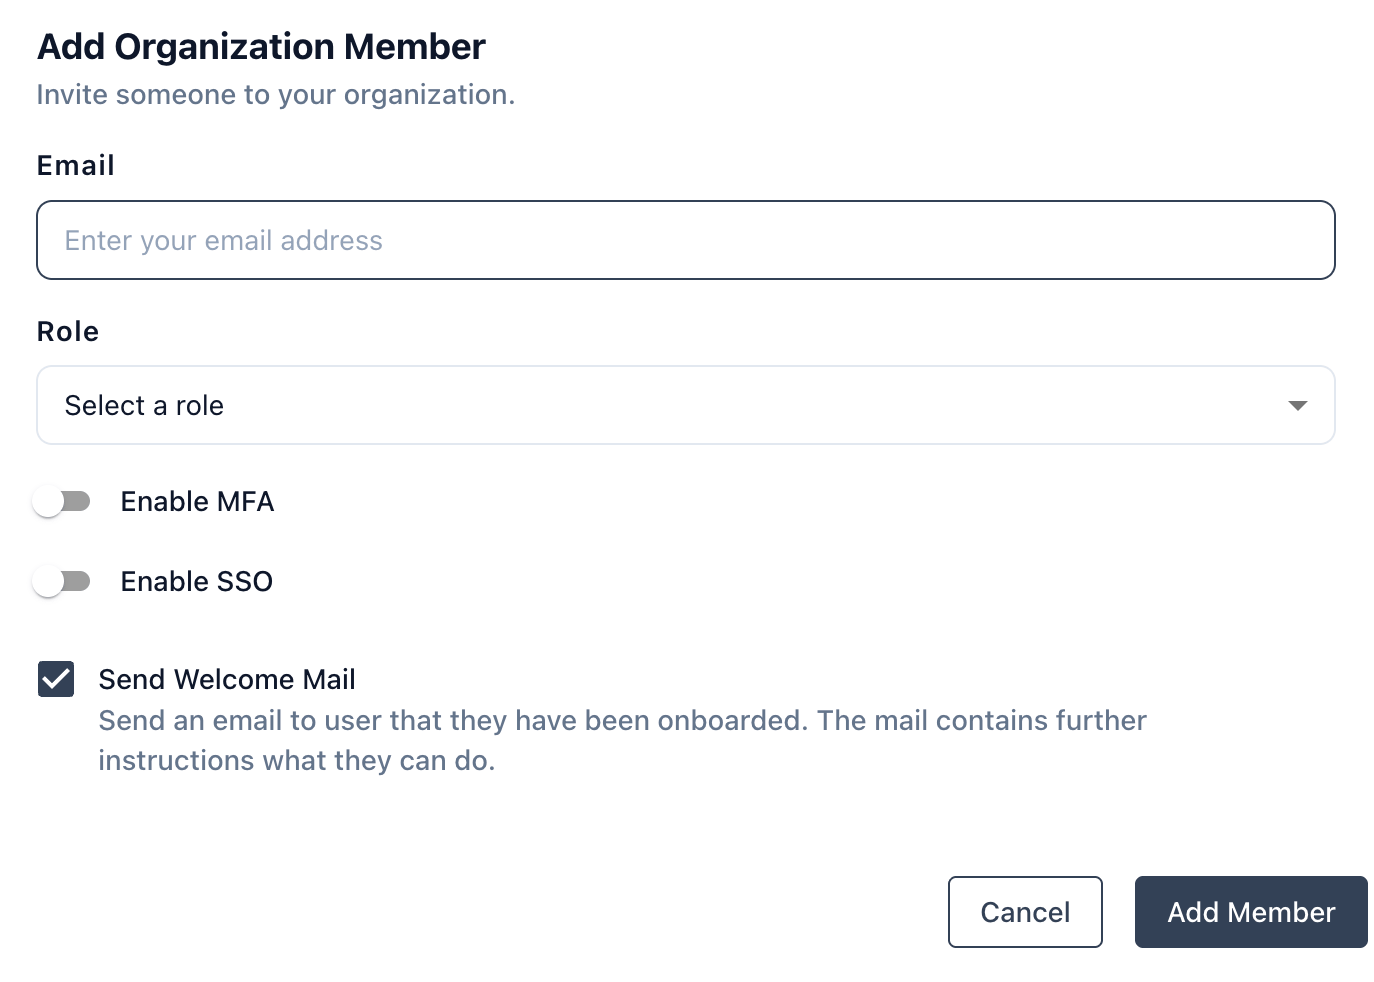 Click the **Select a role** dropdown and choose the appropriate role for the user.
| Role | Typical use |
| :-------------- | :------------------------------------------------------------------------ |
| **Owner** | Full admin access — manages org settings |
| **Steward** | Manages data assets, observability and quality metrics, and documentation |
| **User** | End-user access with no edit permissions |
| *(other roles)* | As defined by your organization |
| Option | Description | Default |
| :------------- | :------------------------------------------------------------------------ | :------ |
| **Enable MFA** | Requires the user to set up multi-factor authentication on first login | Off |
| **Enable SSO** | Allows the user to log in via your organization's Single Sign-On provider | Off |
Click **Add Member** to complete the invitation. The user appears in the Member list and receives a welcome email if that option is enabled.
To cancel without saving, click **Cancel**.
## Managing existing members
Once added, you can manage any member from the Member list:
* **Change role** via the role dropdown
* **Toggle MFA / SSO** on or off
* **Edit** member details using the edit icon
* **Remove** the member using the delete icon in the Action column
* **Audit / Activity** — monitor user activity for a specific member
Click the **Select a role** dropdown and choose the appropriate role for the user.
| Role | Typical use |
| :-------------- | :------------------------------------------------------------------------ |
| **Owner** | Full admin access — manages org settings |
| **Steward** | Manages data assets, observability and quality metrics, and documentation |
| **User** | End-user access with no edit permissions |
| *(other roles)* | As defined by your organization |
| Option | Description | Default |
| :------------- | :------------------------------------------------------------------------ | :------ |
| **Enable MFA** | Requires the user to set up multi-factor authentication on first login | Off |
| **Enable SSO** | Allows the user to log in via your organization's Single Sign-On provider | Off |
Click **Add Member** to complete the invitation. The user appears in the Member list and receives a welcome email if that option is enabled.
To cancel without saving, click **Cancel**.
## Managing existing members
Once added, you can manage any member from the Member list:
* **Change role** via the role dropdown
* **Toggle MFA / SSO** on or off
* **Edit** member details using the edit icon
* **Remove** the member using the delete icon in the Action column
* **Audit / Activity** — monitor user activity for a specific member
 Account creation may require approval from your organization's administrator, depending on how your PRIZM instance is configured. Contact your admin if a new user does not receive access after being invited.