
Overview
The Prizm platform utilizes a flexible Role-Based Access Control (RBAC) system with optional Attribute-Based Access Control (ABAC) filters. This model provides granular control over resource access while remaining operationally manageable for enterprise administrators. The RBAC system enables organizations to align access controls with their specific organizational structure and security requirements through custom roles, hierarchical inheritance, and tag-based filtering.Core Principles
Key Entities
Access
The Prizm platform uses a flexible Role-Based Access Control (RBAC) system with optional Attribute-Based Access Control (ABAC) tag filters. The Access module is the central hub for managing all of this — Members, Groups, Roles, Permission Sets, and Audiences are all managed here.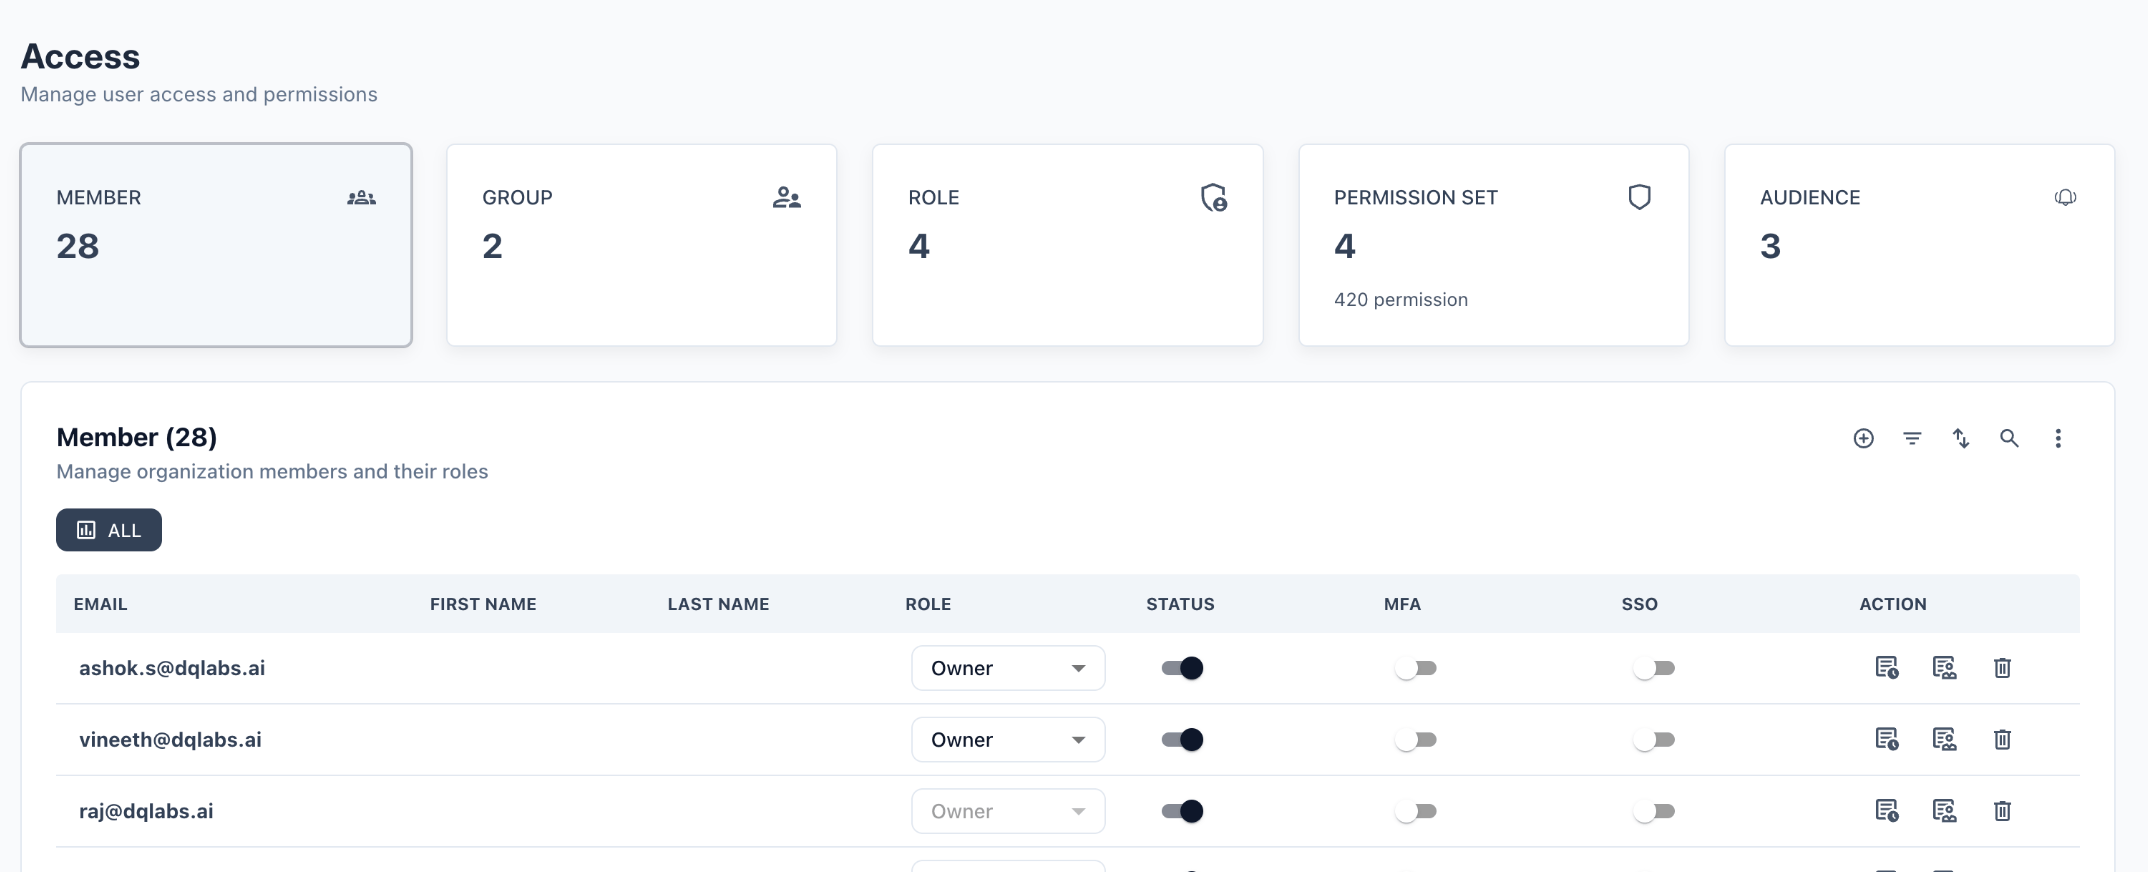
Members
The Member tab lists every user in the organization along with their assigned role, active status, MFA enrollment, and SSO status.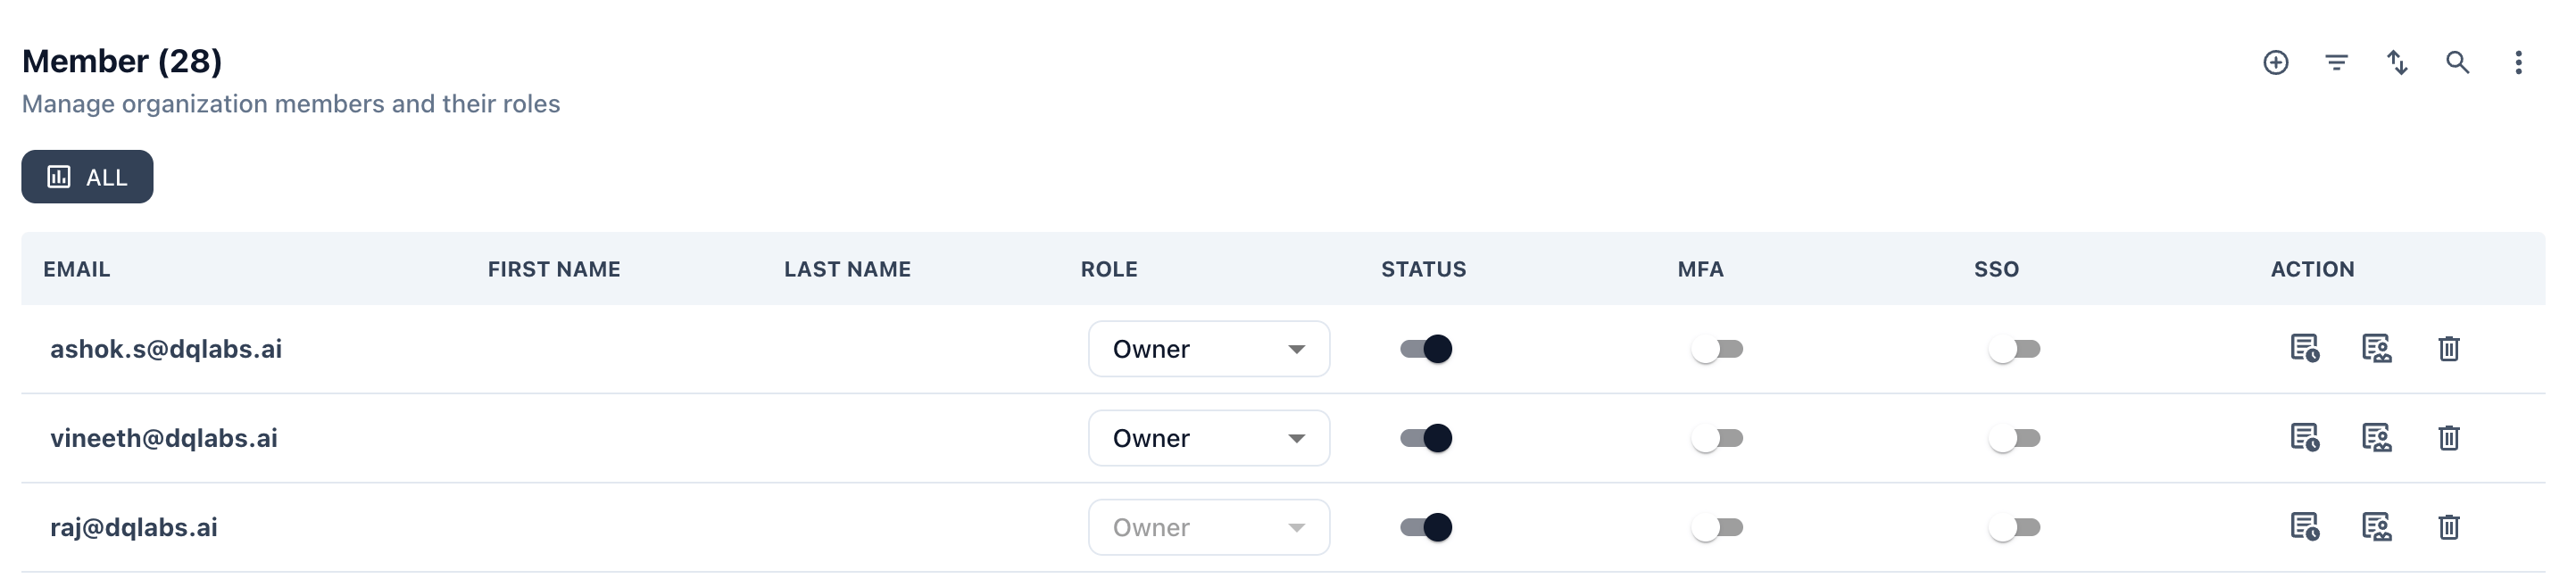
Member Fields
Adding a Member
Click the ⊕ icon in the top-right of the Member section. You will be prompted to enter an email address and select a role. On first login, the user receives an invite email.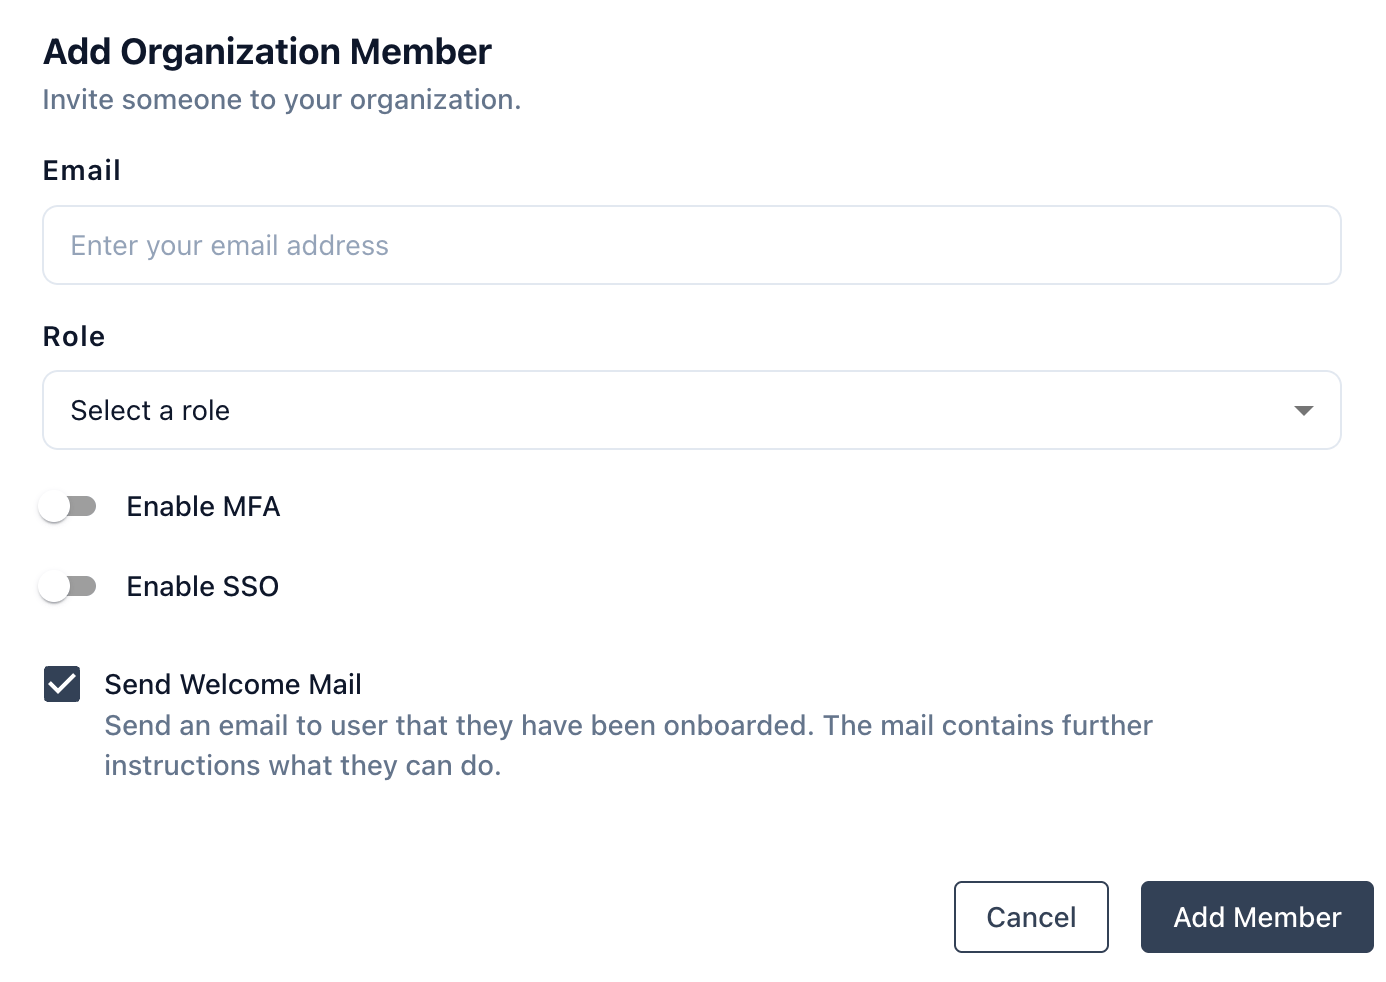
The Owner role cannot be deleted or downgraded by anyone other than another Owner. At least one active Owner must exist in every organization.
Groups
Groups let you assign a single role to a collection of users. When a user’s group membership changes in the identity provider, their Prizm permissions update automatically on next login.
Group Fields
Group vs. Direct Assignment
When a user has both a direct role assignment and a group role assignment, the highest-priority role wins.
Roles
Roles define a named permission profile. Prizm ships with three built-in roles and supports custom roles created by administrators.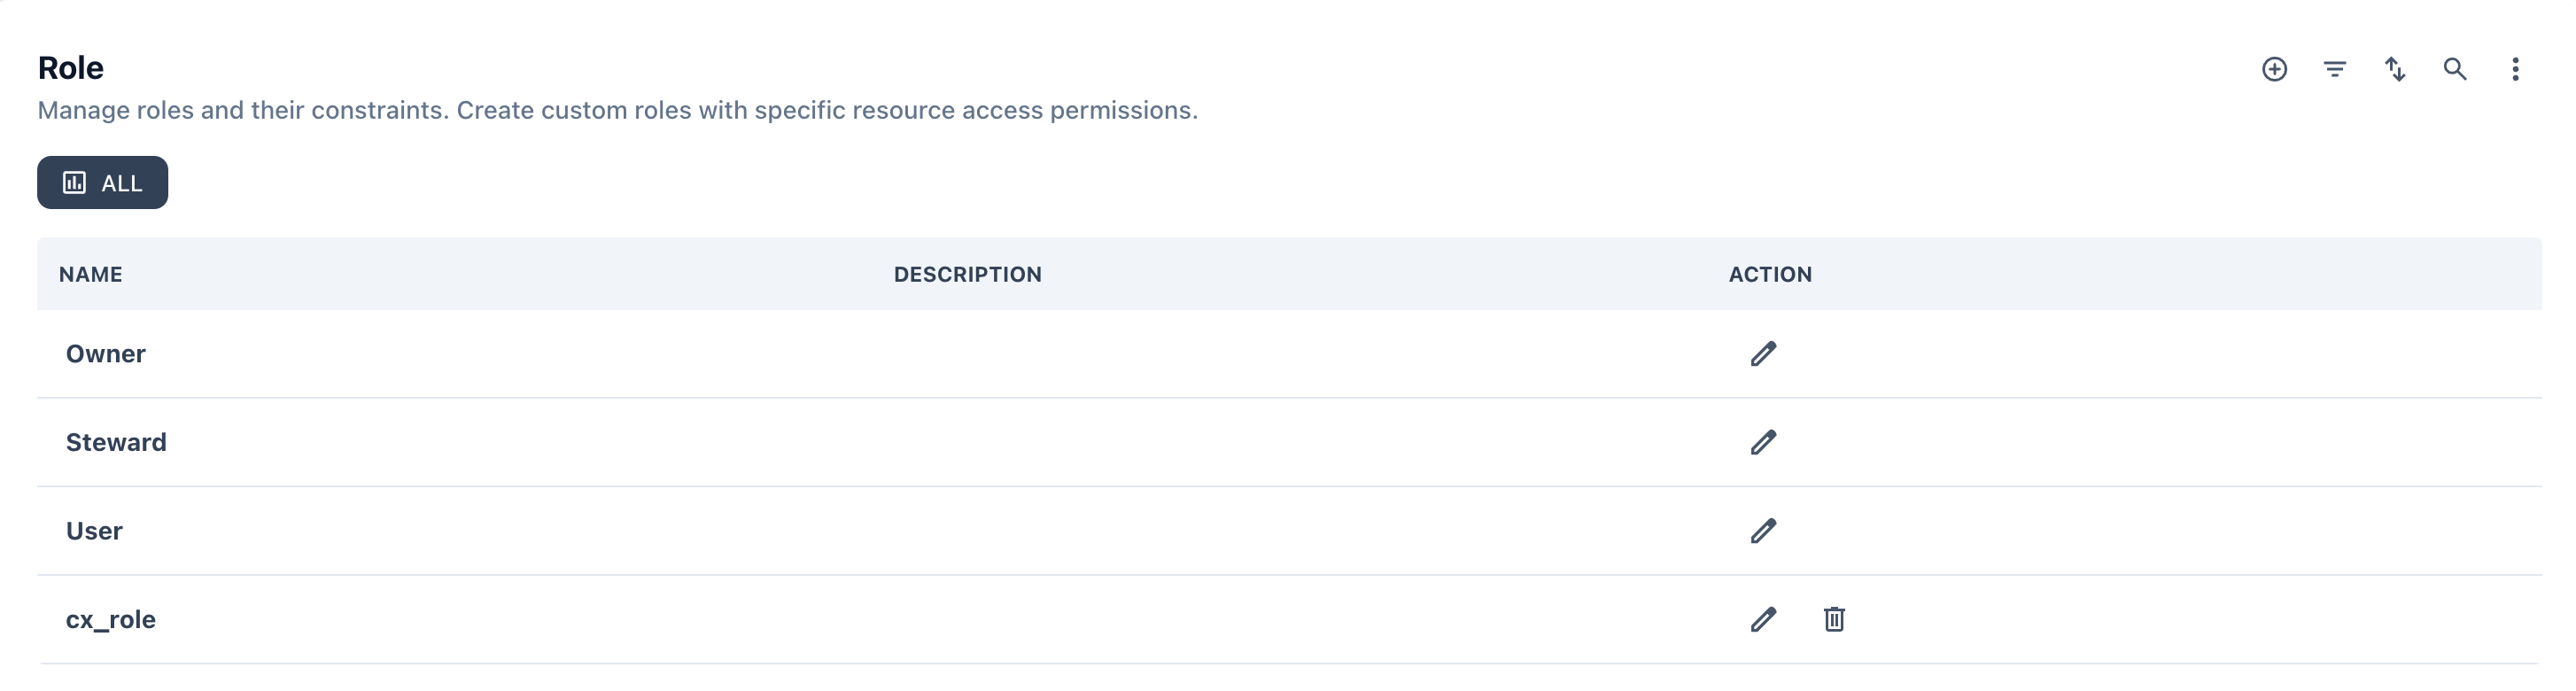
Standard Roles
Role Definitions
Custom Roles
Custom roles (e.g.,cx_role) are created by administrators and can be tailored with any combination of permissions from the Permission Set. Custom roles are assigned a priority of 5+ and appear with both edit and delete actions in the Role table.
To create a custom role:
- Click ⊕ in the Role section
- Enter a name and optional description
- Select the Permission Set to associate with this role
- Save — the role is immediately available for assignment to members and groups
Permission Sets
A Permission Set defines exactly which actions are enabled for each role. The Permission Set view shows a toggle matrix — rows are permission types and columns are the available roles (Admin, Editor, Viewer, and any custom sets).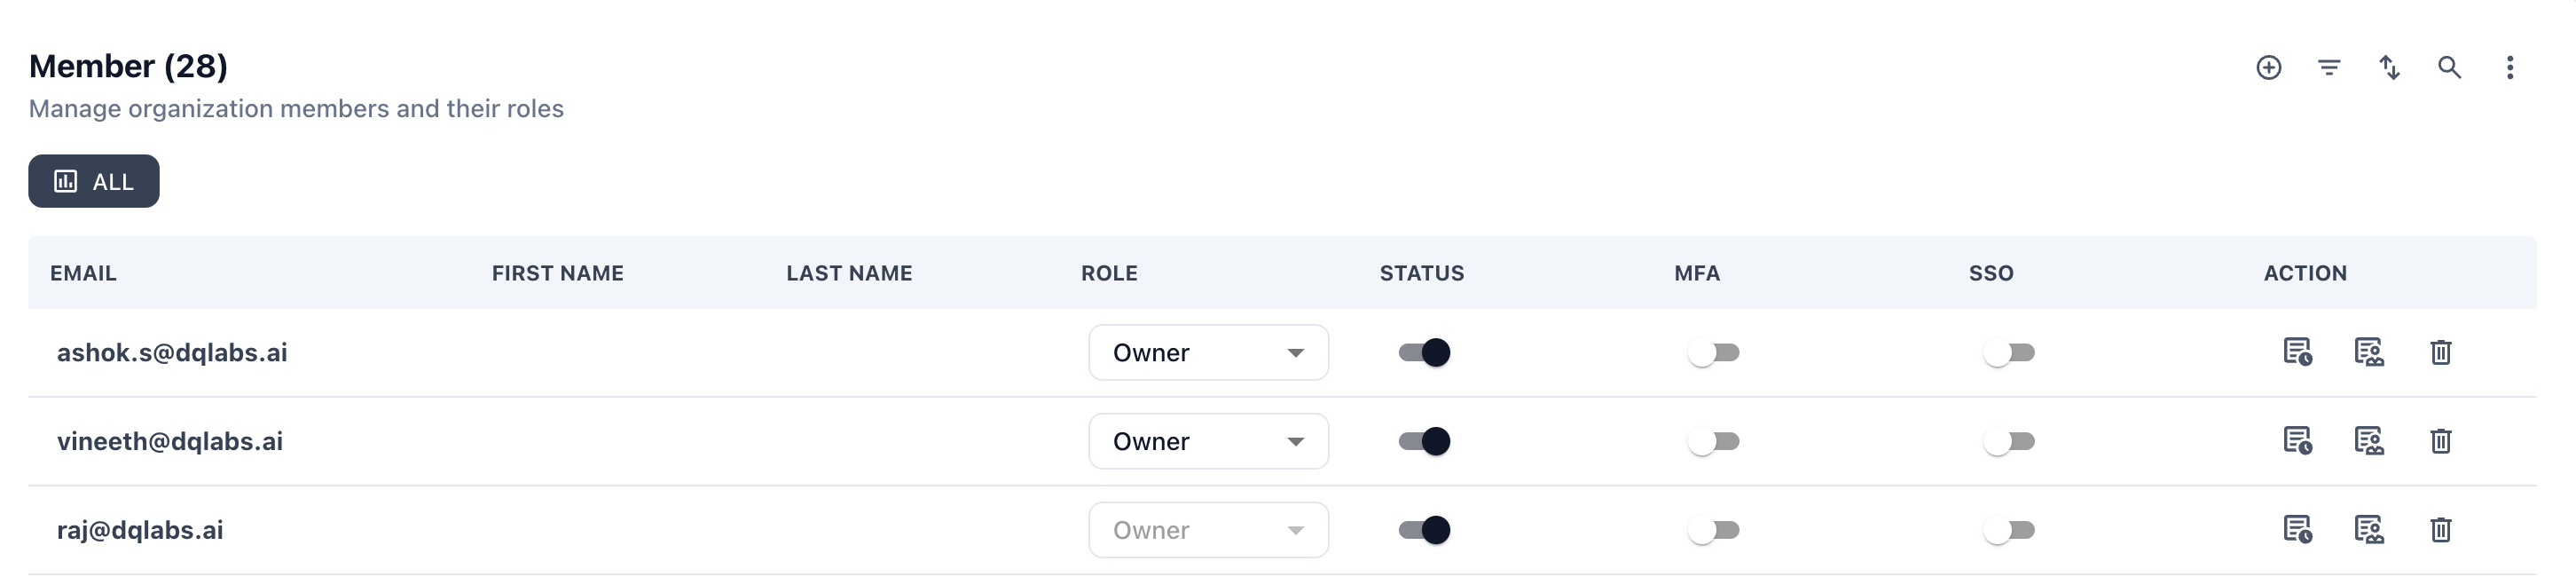
Reading the Matrix
- Dark toggle (●) — permission is enabled for this role
- Light toggle (○) — permission is disabled for this role
- Each row is a
TYPE + ACCESScombination (e.g.,ACCESS › Approve,ALERT › Create)
Default Permission Set Coverage
The four built-in permission sets cover 420 permissions across 25 resource types. The table below summarizes what each role can do by default.Permission Set Matrix
Each Permission Set (Admin, Owner, Steward, Member, Custom) can be assigned with one to many permissions sets and its relevant access.Permission Type Reference
The following table lists every permission type and the actions available for each. This set of permission sets are grouped under a particular permission and that can be tied to a resource assignment.Source is the only resource type with
run and schedule actions in addition to the standard CRUD set. These allow a role to trigger data source syncs and set up recurring ingestion schedules independently of edit rights.Access Evaluation Logic
When a request arrives, Prizm evaluates permissions in this order:1
Identify the user
Look up the authenticated user and resolve all group memberships.
2
Collect role assignments
Gather every role assignment — direct (Member tab) and via groups (Group tab) — at the Application level.
3
Resolve the highest role
Apply the highest-priority role when a user has multiple assignments. Owner (3) beats Steward (2) beats User (1); custom roles at 5+ always take precedence.
4
Load the Permission Set
Fetch the Permission Set associated with the winning role and read the enabled toggles.
5
Apply tag constraints
If the assignment includes
allow or deny tag constraints (ABAC), filter the resource list accordingly.6
Enforce
Return the final access decision. Deny constraints always override allow, even when only a single resource carries a deny tag.
Role Consolidation: All applicable roles are collected from user and group assignments. The highest-priority role’s permissions take precedence. Tag-based filters then further refine which resources are accessible.
Assignment Structure
Access assignments follow a consistent JSON format that maps users or groups to roles on specific resources:Key Rules
allow: ["*"]— grants access to all tag variants of the resourcedeny: ["PII"]— blocks access to PII-tagged rows/columns even if other constraints allow- A deny on any one resource is honoured even when all other resources in the assignment use
allow: ["*"] - Assignments have an optional
expiry_datefield for time-limited access grants
Assignment Examples
Owner of two domains (no tag restrictions) E.g., Bob is an Owner of Domain Customer360 and Domain Marketing
Owner of two domains (no tag restrictions) E.g., Bob is an Owner of Domain Customer360 and Domain Marketing
Steward scoped to Internal-tagged resources only E.g., Sarah is a Steward of Product MarketingData but only for Internal-tagged resources
Steward scoped to Internal-tagged resources only E.g., Sarah is a Steward of Product MarketingData but only for Internal-tagged resources
Group with PII denied across two resources E.g., Group Marketing has Member access but cannot see PII-tagged data
Group with PII denied across two resources E.g., Group Marketing has Member access but cannot see PII-tagged data
Global Admin (full access, all resources) E.g., Peter is a global Admin
Global Admin (full access, all resources) E.g., Peter is a global Admin
User denied for PII Data across all resources E.g.., Ashok is a global Steward but cannot see PII data
User denied for PII Data across all resources E.g.., Ashok is a global Steward but cannot see PII data
Database Schema Reference
Schema Components
Assumptions
- Assignments exist at either User or Group level, identified by the
assignee_typevalue ("user"or"group"). - User-level assignments are implemented in application code by referencing the
user_groupstable, which stores user-group mapping information. - Access constraints are applied at the resource level (e.g., Domain:
"Marketing", Product:"SAP_Prod"). - The Assignments table contains only one record per user. The
assignee_idfield serves as a Unique Index or Business Key. - When no access constraints are defined for a resource, users/groups receive default
"allow": ["*"]access.
Access Evaluation Process
The system determines effective permissions through a multi-step evaluation process at runtime:1
Identify the user
Identify the user and their group memberships.
2
Resolve role assignments
Resolve all relevant role assignments — both group-level and user-level — at the Application Level.
3
Collect permissions
Determine all permissions from the assigned roles.
4
Apply highest scope
Apply the highest permission scope when conflicts exist between roles.
5
Apply constraints
Optionally filter results by tag, sensitivity, or ownership constraints.