
- SQL Server (On-Premises / VM)
- Azure SQL Database / Managed Instance
Prerequisites
Before connecting, ensure the following are in place:- The SQL Server instance is network-accessible from the Prizm agent on port 1433.
- SQL Server TCP/IP is enabled (SQL Server Configuration Manager → Protocols → TCP/IP → Enabled).
- A dedicated SQL login exists for Prizm with the required permissions (see below).
Required Permissions
Run the script below against each database you want to include. Replace<prizm_login> with your service account name and <database_name> with the target database.Authentication
Two methods are supported:For Windows Authentication, create the login using
FROM WINDOWS:Network & Firewall
- TCP port 1433 must be open between the Prizm agent and the SQL Server host.
- If your SQL Server is behind a firewall or in a private network that Prizm cannot reach directly, deploy the Prizm Outbound Agent inside your network. The agent connects outbound to Prizm over WSS port 443 — no inbound firewall rules required.
- If outbound connectivity from the agent is restricted, allow the Prizm agent’s egress IPs:
Connector Setup
The steps below apply to both deployment types. Where a field value differs between SQL Server and Azure SQL, the difference is noted inline.1
Open the connector wizard
Navigate to Sources and click Add. Select SQL Server from the source type grid.
2
Choose an authentication method
Select Username and Password from the Authentication Type dropdown and enter the SQL login credentials created in the Prerequisites step.For on-premises deployments on domain-joined hosts, Windows Authentication is also available — select it from the dropdown. No credentials are entered; authentication is handled by the agent host’s OS identity.
3
Configure asset scope
Once valid authentication details are provided, the asset selection page opens. Use Include and Exclude wildcard patterns to control which schemas and tables are onboarded.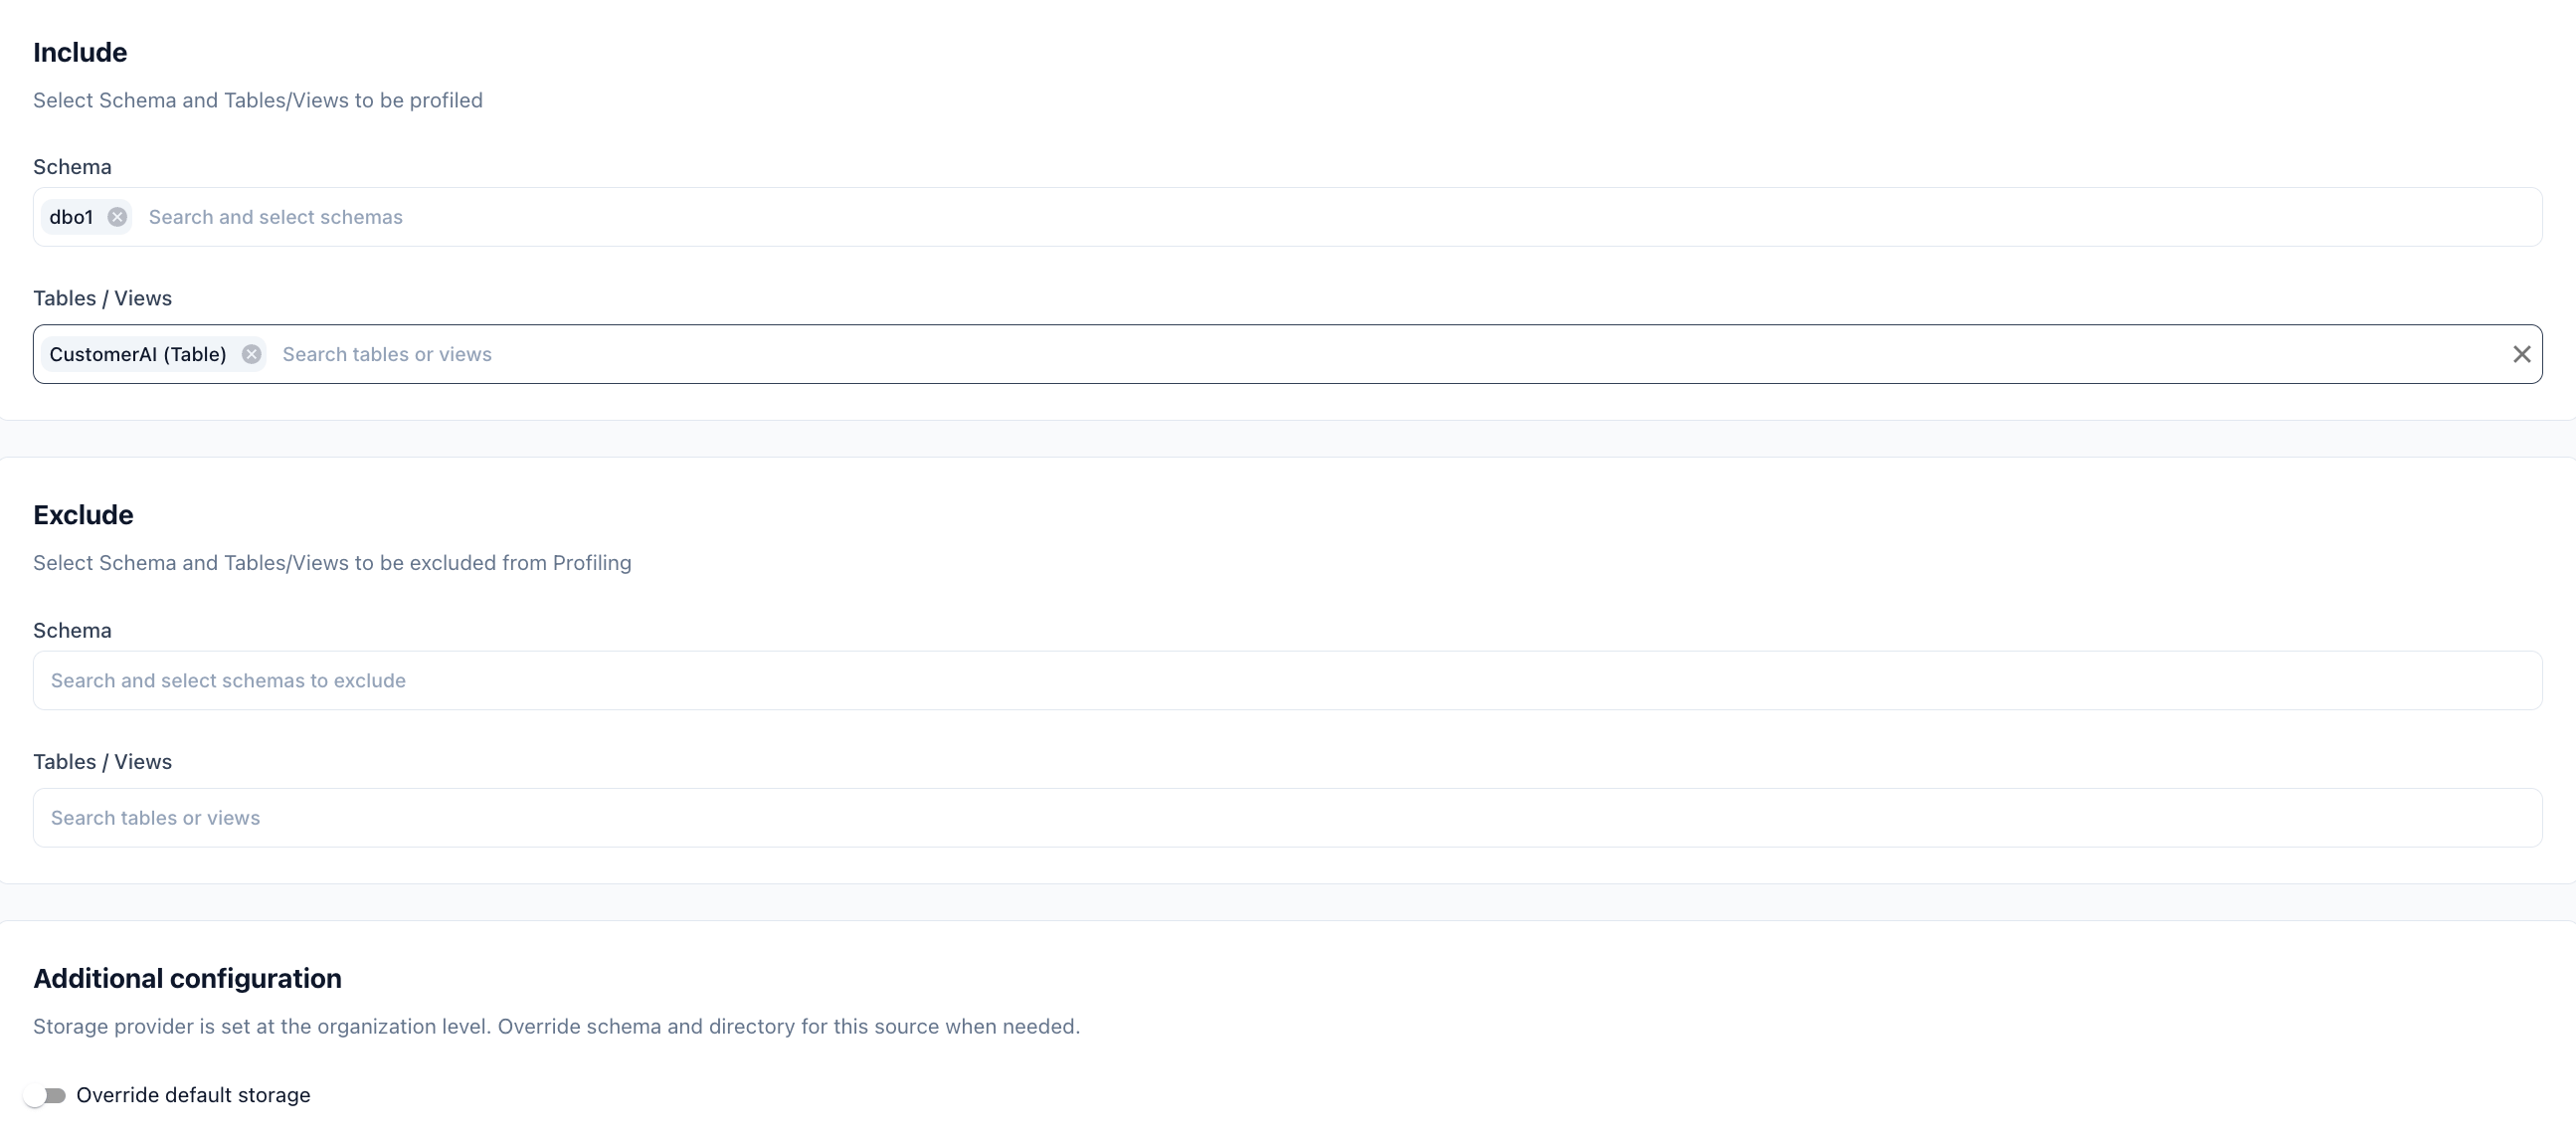
Exclude rules take precedence over include rules when both match the same object.
4
Job schedules
You can override each schedule individually from the connector detail page after saving. If a job is triggered manually, it runs immediately without affecting the configured schedule.
5
Save and verify
Click Update to save the connection. Prizm runs an initial full scan immediately — assets appear in the catalog within a few minutes. Navigate to Settings → Connectors → Logs to monitor scan progress.
Next Steps
What We Collect
See the full field-level breakdown of every metadata object Prizm extracts.
FAQ
Common questions about credentials, scoping, and permissions.