
Connecting Jira to Prizm
Setting up the Jira integration involves three steps: authorizing Prizm to access your Jira Cloud account via OAuth, configuring which Jira project and issue type Prizm should use, and optionally enabling a webhook so that Jira status changes sync back to Prizm in real time.Prerequisites
- A Jira Cloud account
- Permission to authorize OAuth applications in your Atlassian organization
- At least one Jira project where data quality issues will be created
Step 1: Authorize with Atlassian
Navigate to Organization → Integration and click the + button to open the Channels catalog. Select the Jira tile. Prizm redirects you to Atlassian to sign in and grant Prizm access to your Jira Cloud instance. After approving access, you are returned to Prizm. The Site (your Jira URL) and Cloud ID are populated automatically from the OAuth handshake.If a Jira integration already exists, clicking the Jira tile navigates to the existing configuration. To switch the connected Atlassian account, click Reconnect on the configuration page, which restarts the OAuth flow.
Step 2: Configure projects and issue types
1
Add a project
In the Projects Config section, click Add project. Select the Jira Project Name from the dropdown — this list is populated from the projects visible to the authorized Atlassian account. Select the Issue Type that Prizm should use when creating tickets in that project (e.g., Bug, Task, Story, Epic).
2
Set a default project
Toggle Default on the project row you want Prizm to use automatically. Exactly one project must be set as the default. You can add multiple projects and switch the default at any time.
3
Add additional projects (optional)
Click Add project again to configure additional project/issue-type combinations. This is useful when different teams or domains route to different Jira projects.
Step 3: Configure priority mapping
In the Priority section, confirm how Prizm severity levels map to Jira priority codes. Click a number to change the mapping for any severity level.
Adjust these values if your Jira projects use a custom priority scheme where codes have different meanings.
Step 4: Enable webhook for bidirectional sync
Check Enable webhook to allow Jira to push status, comment, priority, and assignee changes back to Prizm in real time. Without a webhook, sync only flows from Prizm to Jira. After clicking Update Integration, Prizm generates a Webhook URL. Copy this URL — you need it in the next section.If an alert has multiple Jira issues linked to it, status sync via webhook is disabled for that alert to avoid conflicting updates. Only alerts with a single linked Jira issue receive automatic status sync.
Step 5: Save the configuration
Click Update Integration (or Validate Integration first to confirm the connection). Prizm confirms the connection is active and begins creating Jira issues automatically for new data quality issues.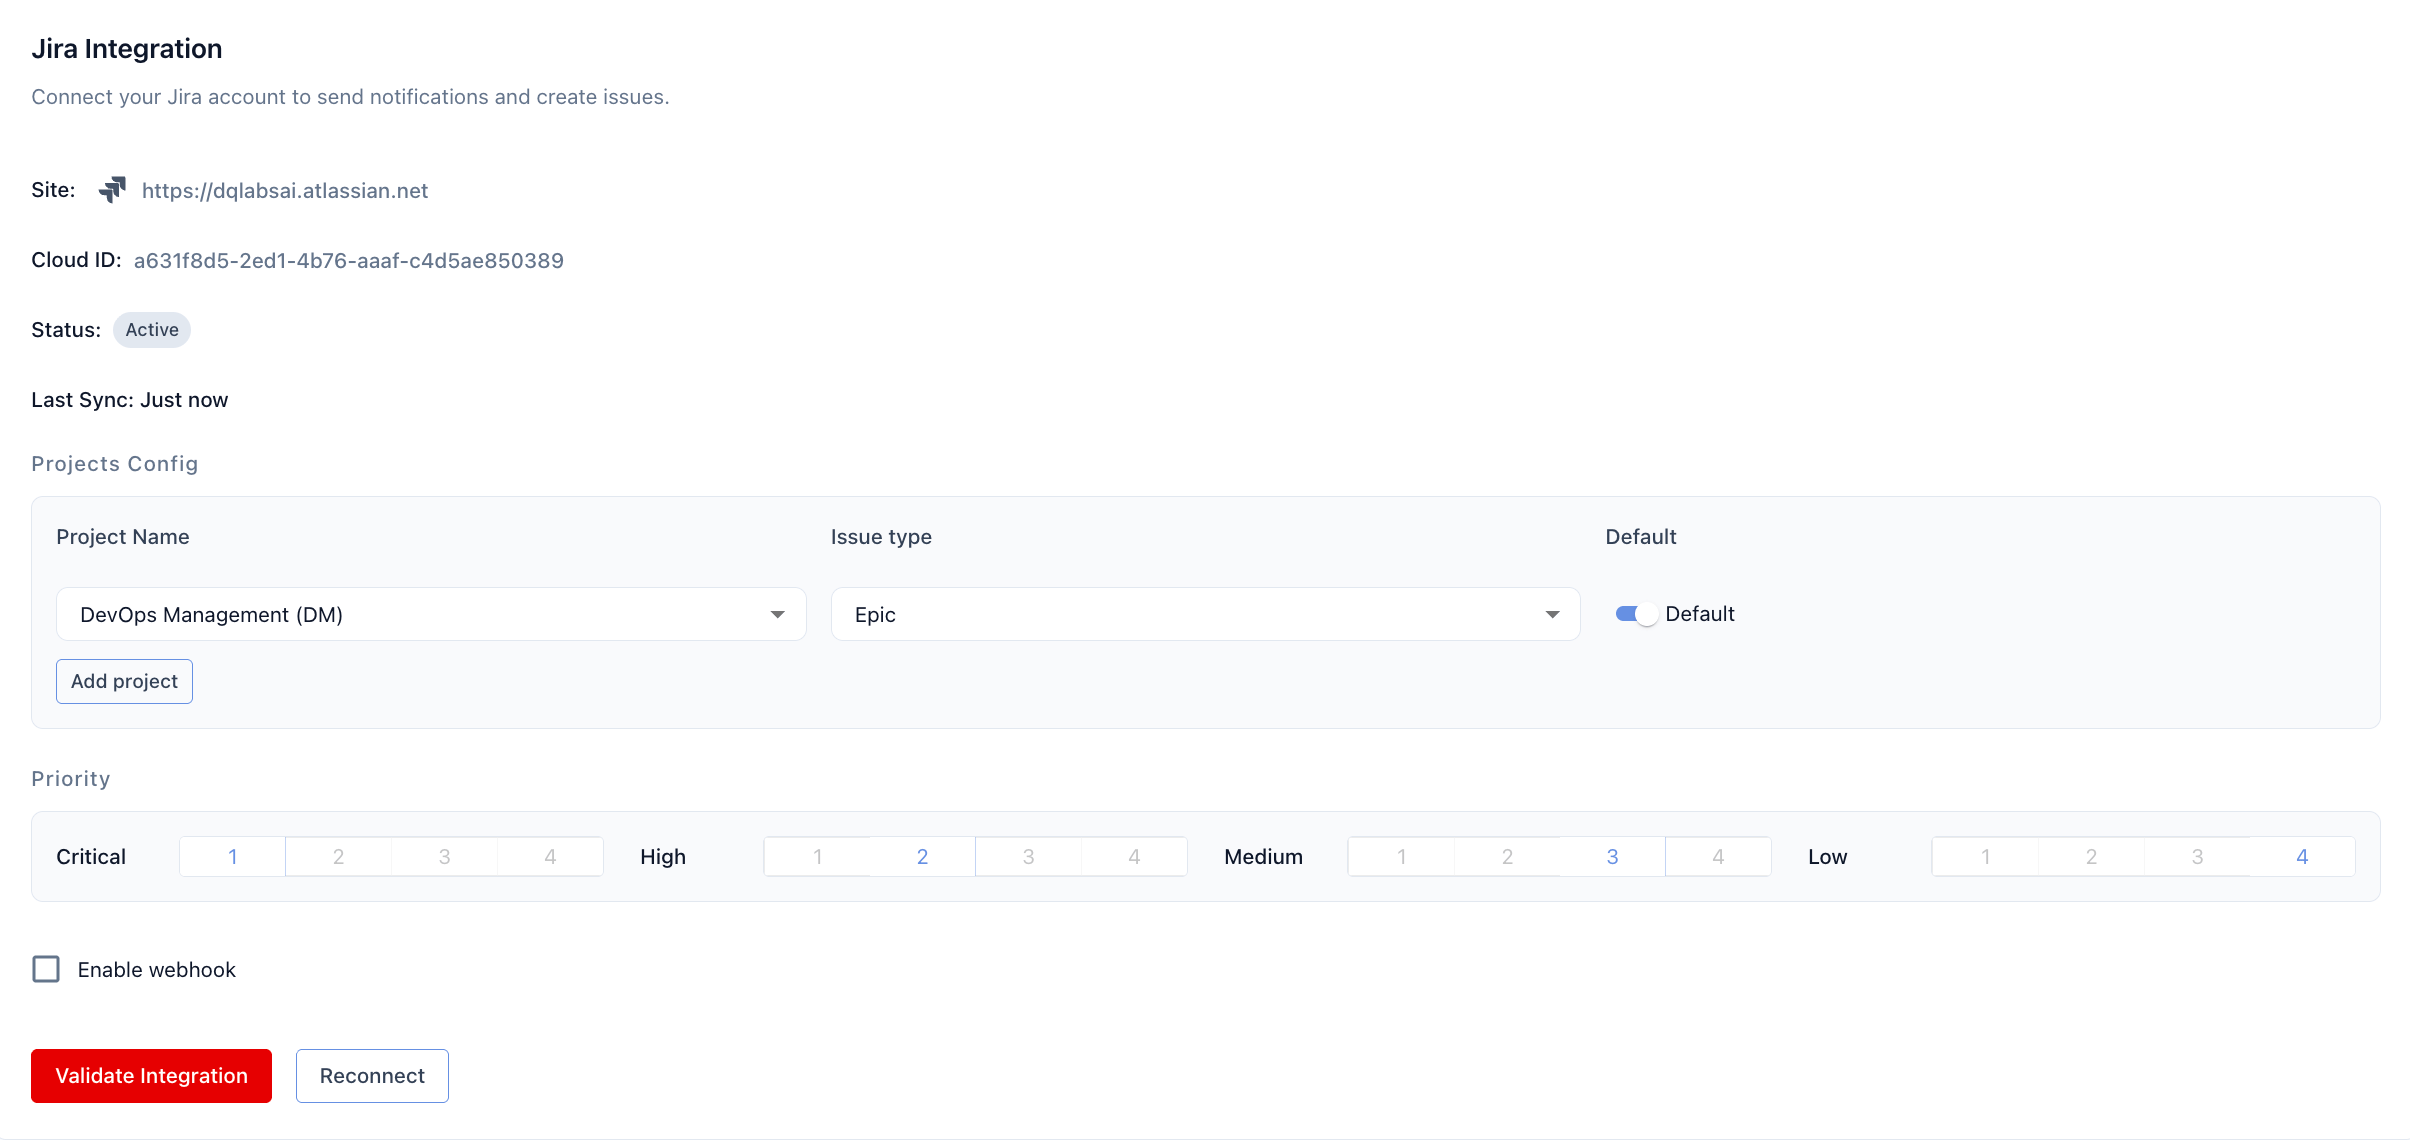
Configuration reference
The Atlassian account used for OAuth must have permission to create issues in the configured Jira projects. Prizm needs: Browse Projects and Create Issue permissions. If Prizm cannot list projects after authorization, verify the account’s project-level permissions in Jira.