
Prerequisites
Before connecting, create a dedicated Prizm role in Snowflake and grant it the minimum required permissions. Run the script below for each database you want to include.IP Whitelisting
If your organization uses a whitelist to manage Snowflake access, Prizm will only access your Snowflake database through the following IP addresses. Add these to your Snowflake network policy before connecting.Connector Setup
1
Open the connector wizard
Navigate to Sources and click “Add”. Select Snowflake from the source type grid.
2
Choose an authentication method
Select your authentication type from the dropdown and provide the required credentials. Click Next to proceed.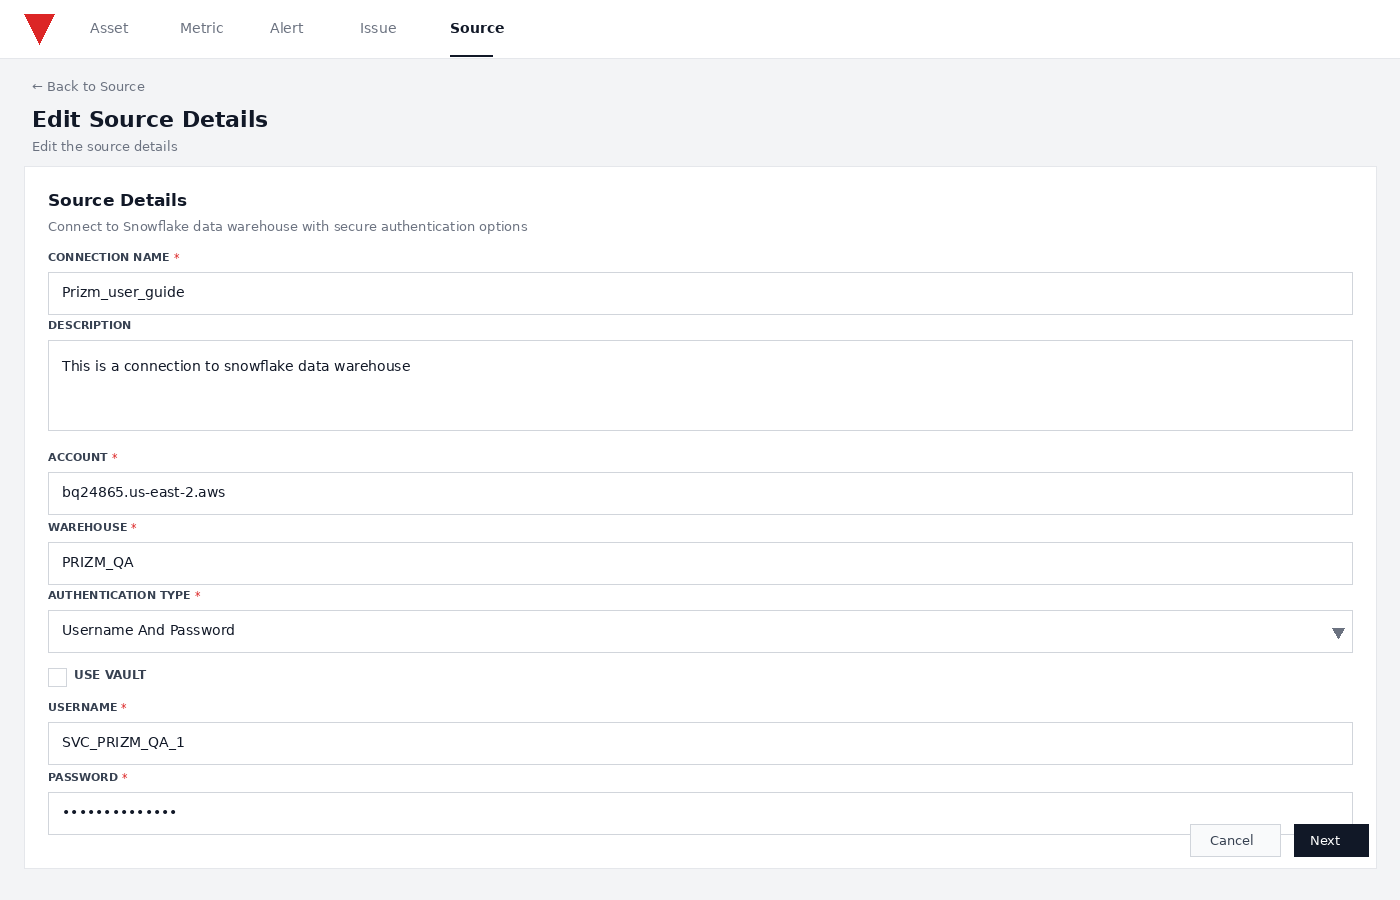
- Username & Password
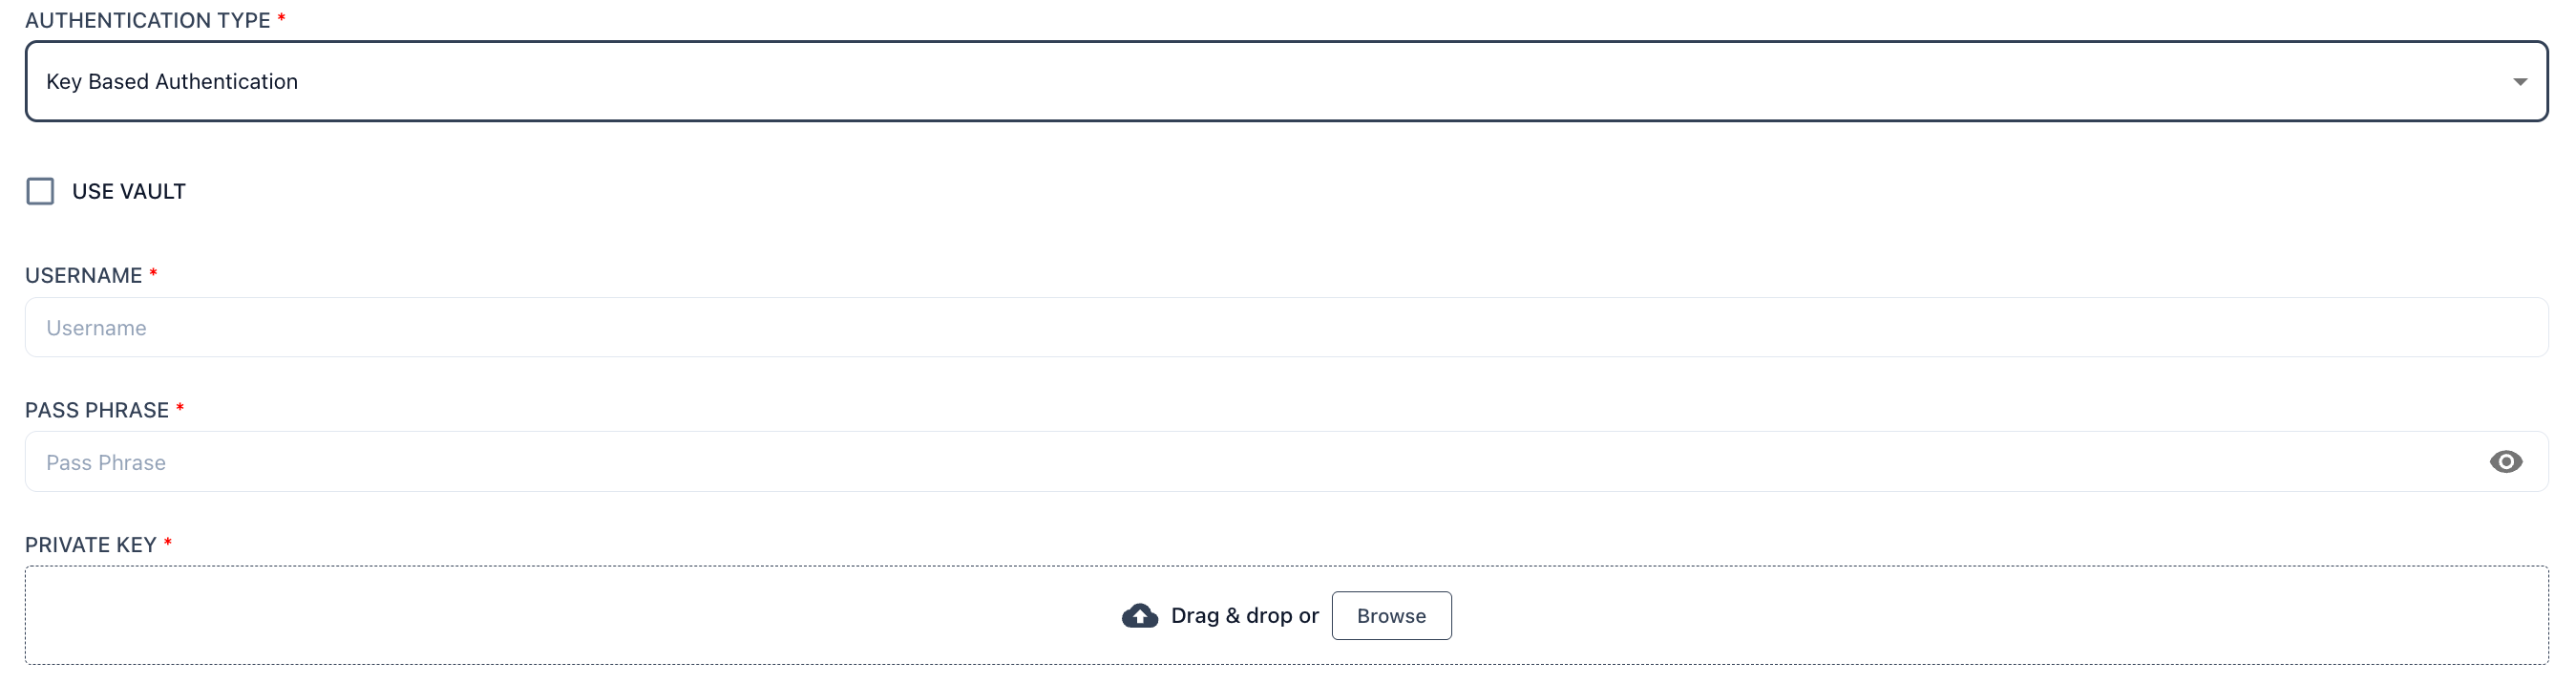
- Key Pair
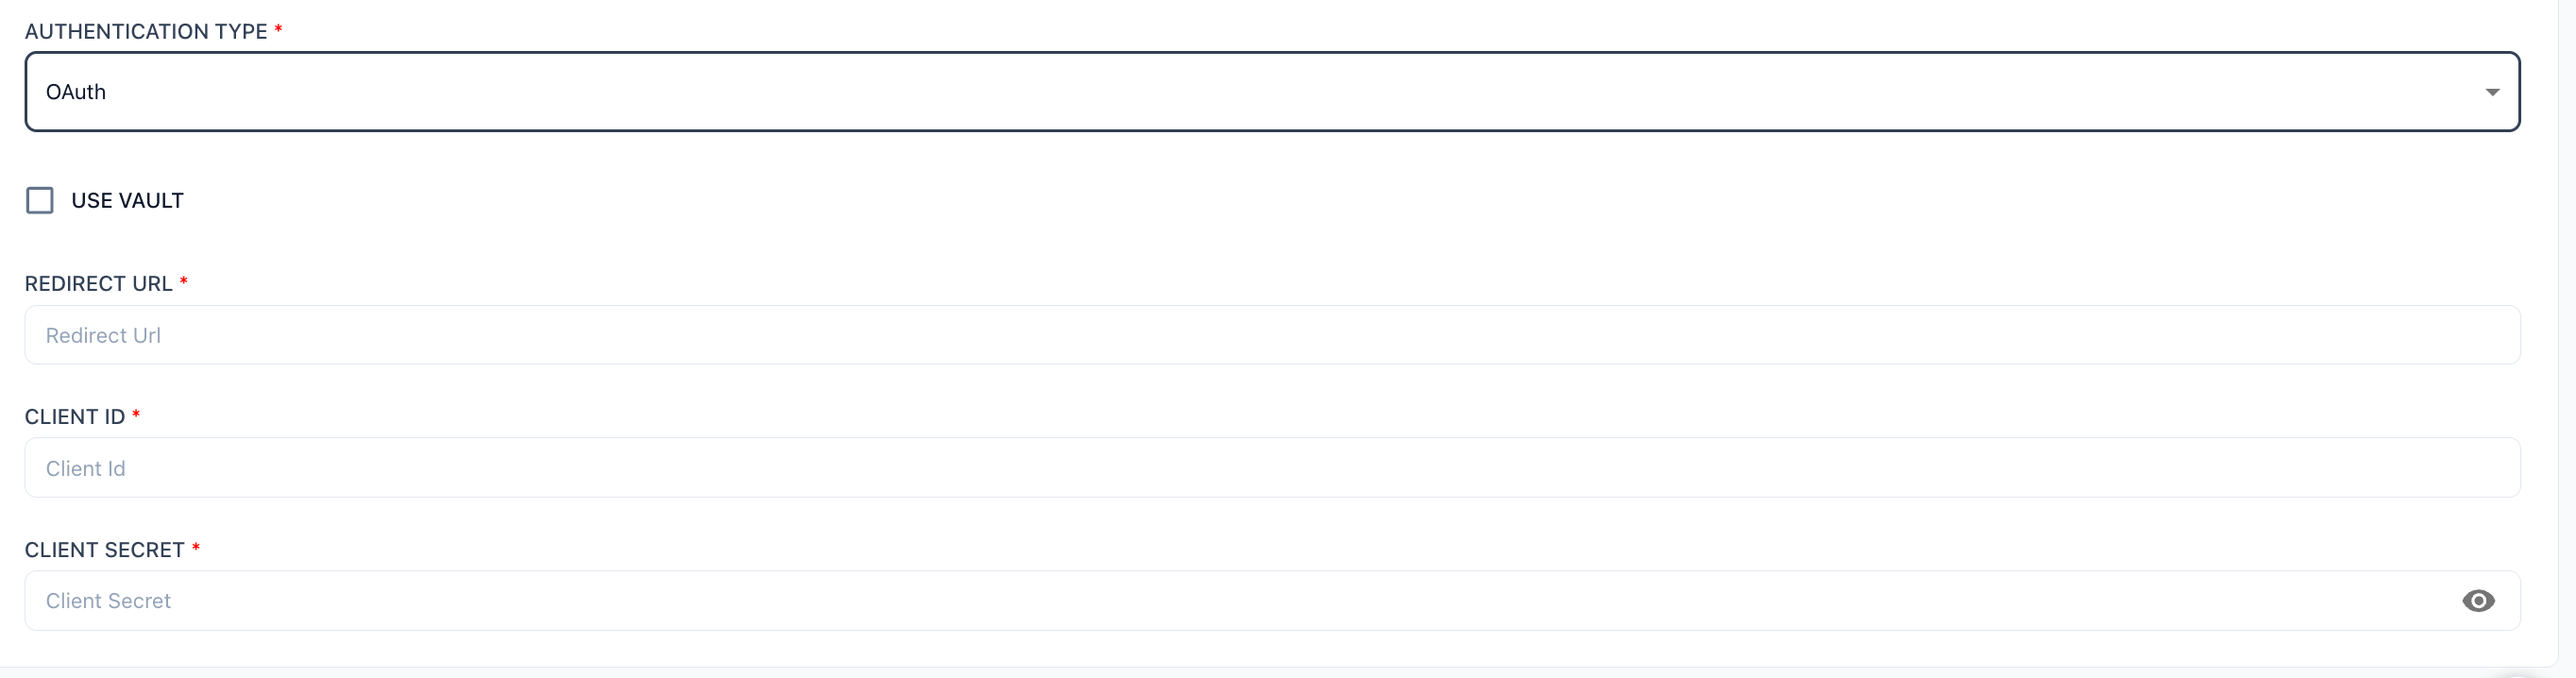
- OAuth
Select Username And Password from the Authentication Type dropdown, then fill in the following fields: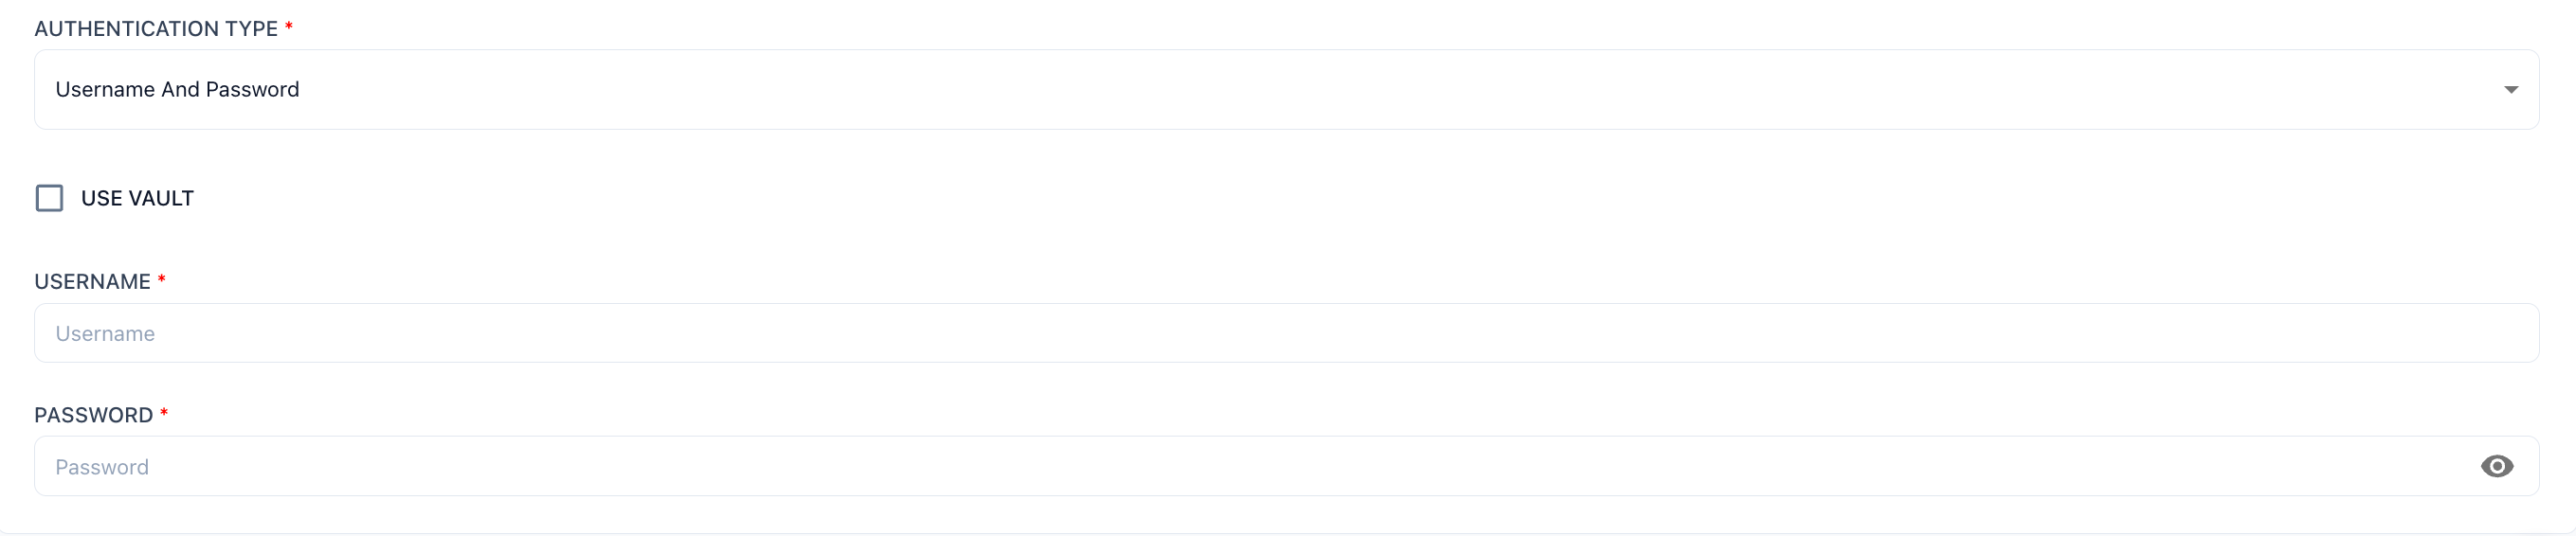
No additional Snowflake-side setup is required beyond the service account created in the Prerequisites step.
3
Configure asset scope
Once a valid authentication details are provided, the user will be taken to the asset selection page, use Include and Exclude wildcard patterns to control which objects are onboarded.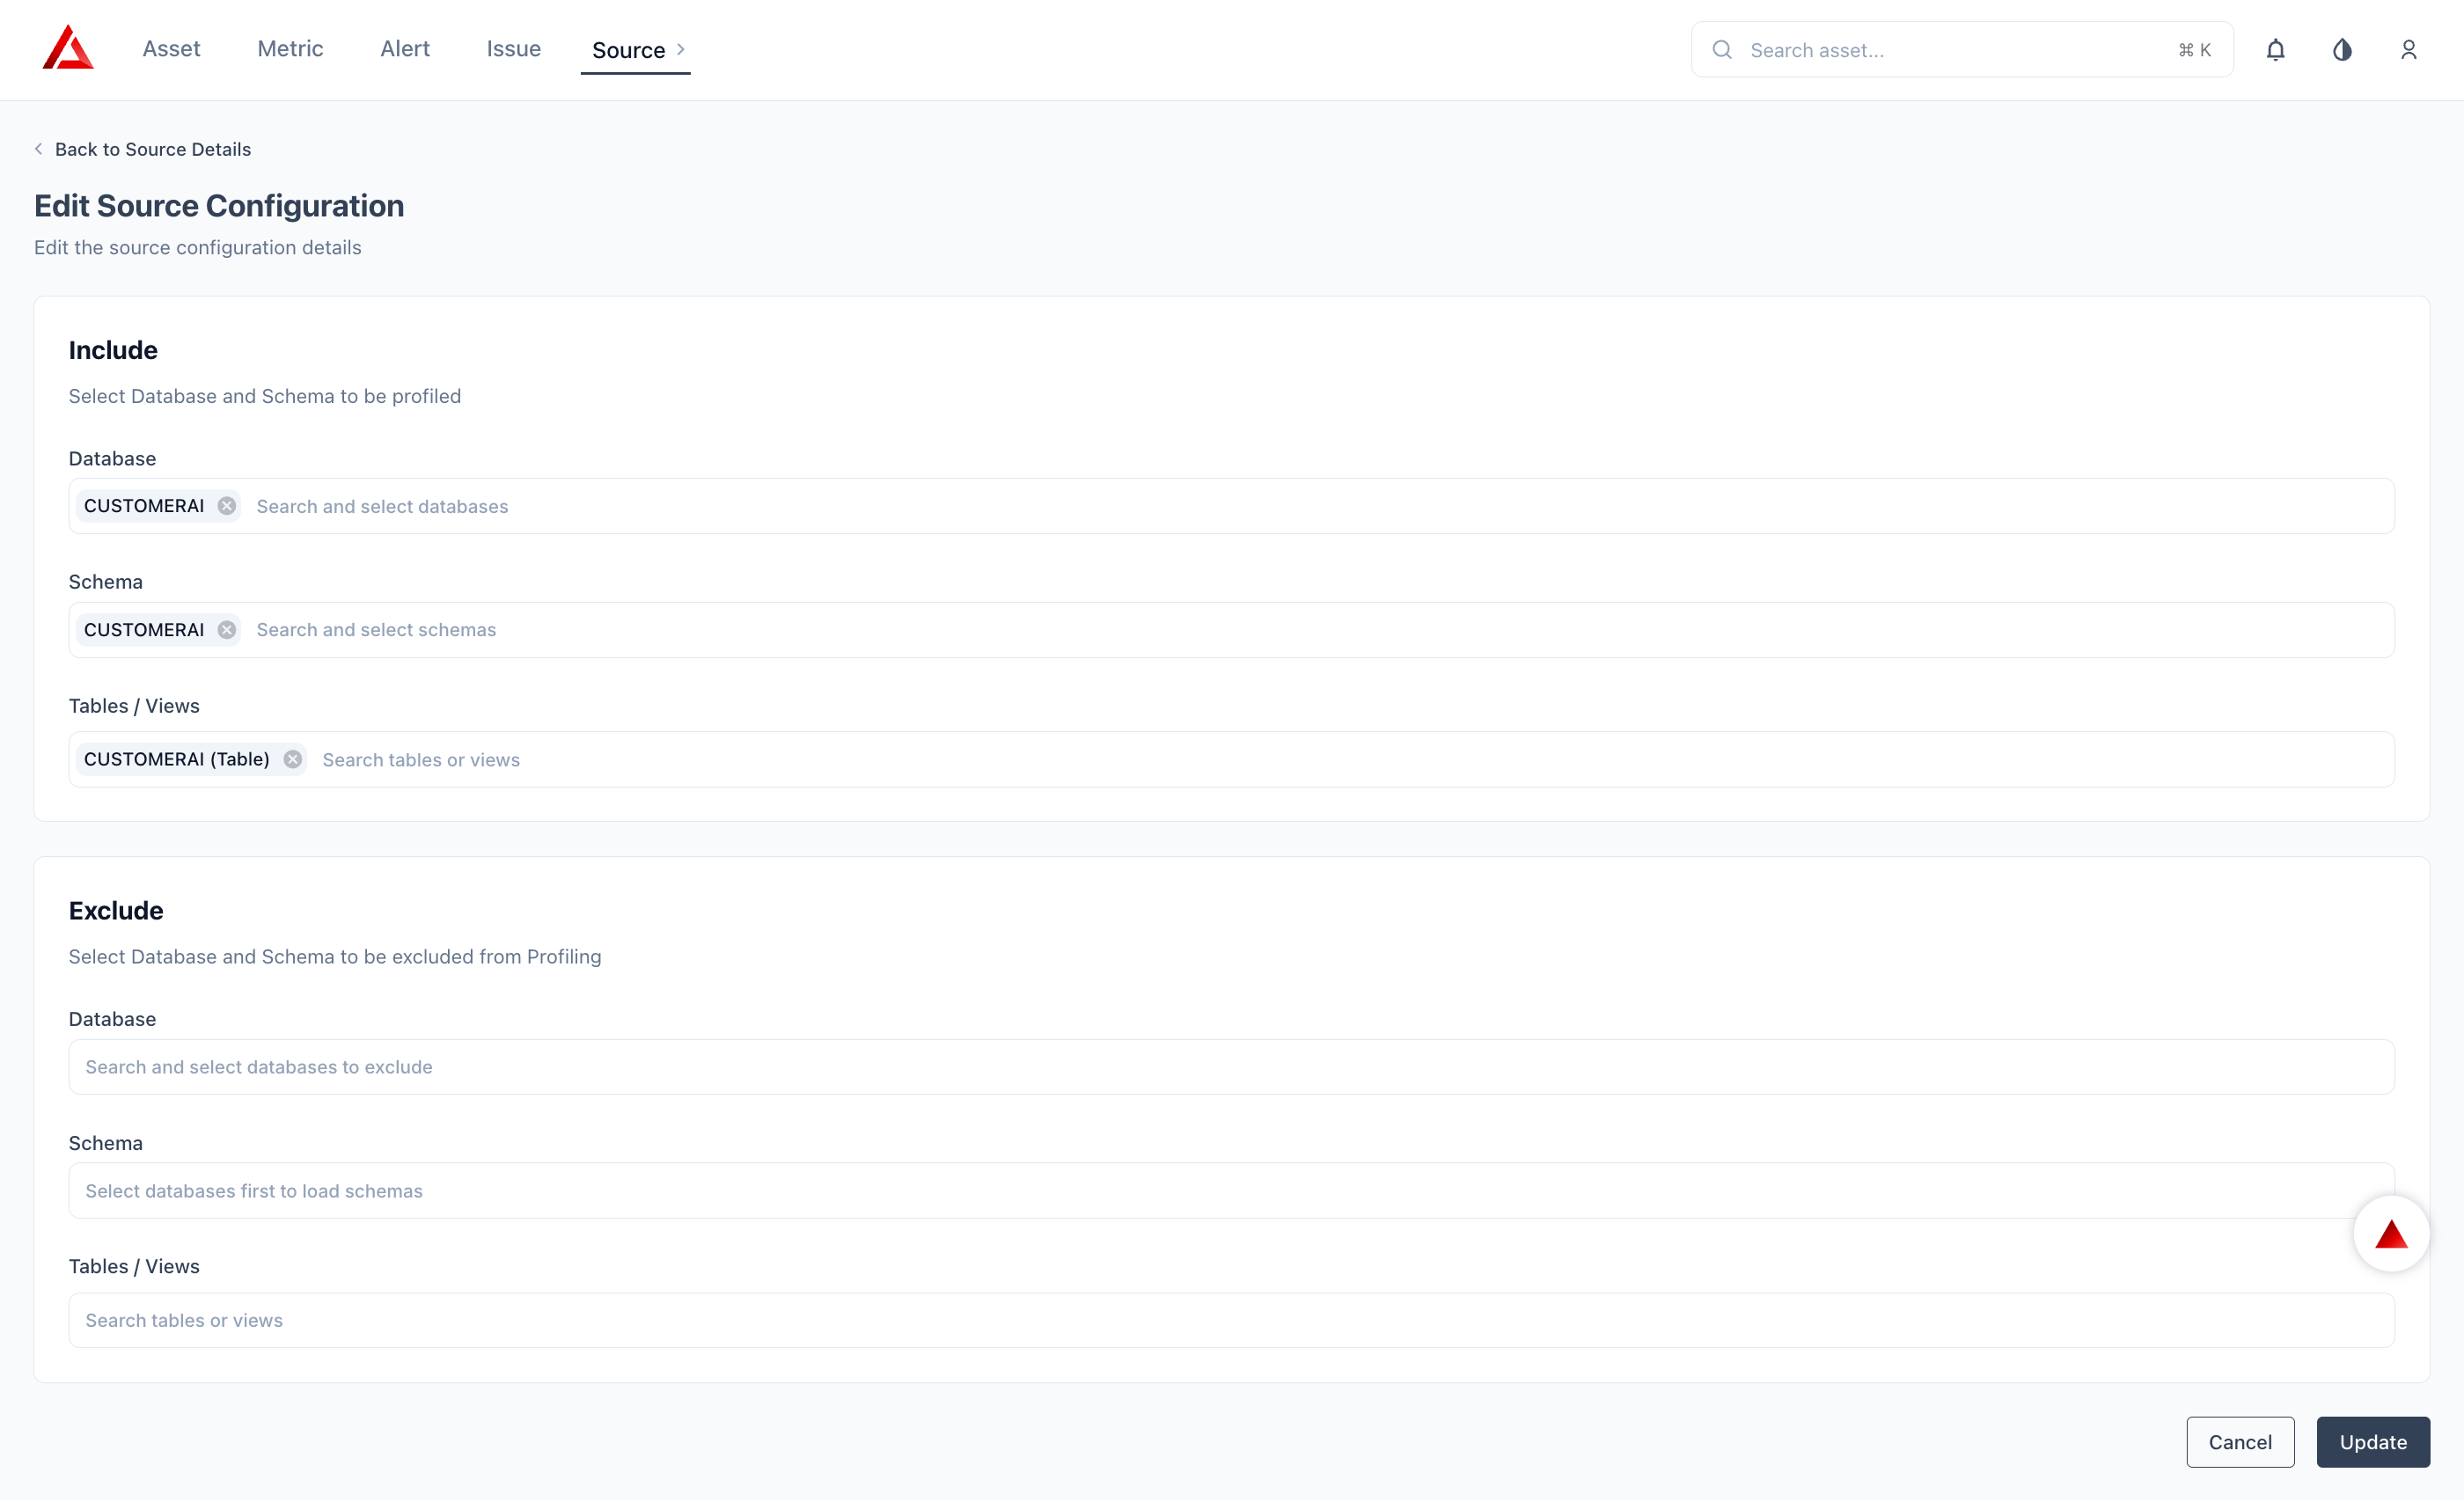
Exclude rules take precedence over include rules when both match the same object.
4
Job schedules
Older Prizm documentation and some support runbooks refer to these same jobs as Catalog, Observability, and Pipeline. If you’re following an older guide: Catalog = Technical, Observability = Operational, and Pipeline observability is covered by Governance/Performance depending on the signal. See Scheduling for the full current job list.
5
Save and verify
Click Update to save the connection details. Prizm runs an initial full scan immediately — assets appear in the catalog within a few minutes. Navigate to Settings → Connectors → Logs to monitor scan progress.
Concurrency & Performance Impact
Prizm controls workload concurrency at the job orchestration layer, not via a per-customer Snowflake connection pool limit. Higher concurrency settings increase the number of parallel queries against the configured warehouse. Invalid or inactive sources are excluded from scheduling, which reduces unnecessary load.Next Steps
What We Collect
See the full field-level breakdown of every metadata object Prizm extracts.
FAQ
Common questions about credentials, scoping, and permissions.
Troubleshooting
Diagnose connection failures, permission errors, and timeouts.